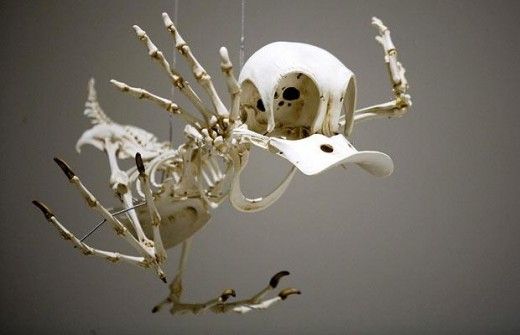
RealtimeUK's Christmas movie Elf 'N' Safety from RealtimeUK on Vimeo.
賈伯斯給主管的五堂課
天下雜誌: 賈伯斯給主管的五堂課
http://www.cw.com.tw/article/index.jsp?page=1&id=42427作者:陳孟珠 出處:Cheers 96期 2010/12
蘋果電腦創辦人賈伯斯的傳奇,大家早就耳熟能詳。然而我們除了聽他的故事、用他的產品,毫無疑問地,我們還能向他學管理。
..........................................................
ICE transfer of FxTree Tracking operator
The compound internally builds a camera frustum and translates fxtree tracking data to 3d data.
Two things you should know before using:
- be sure to align camera and interest Y position before applying the compound. (that's because frustum rotation is not being calculated yet)
- change the image resolution inside the compound to fit your dimensions. (didn't find a way of retrieving image resolution right inside the ice tree)
...being using this one a lot in shots involving simple 2d tracking (no rotation, or hand keyed rotations) for object replacements, prop attachments, etc..
compound will be stored under Tools > Tracking.
softimage 更名軟體 Dafeng Renamer

http://community.softimage.com/downloads/plugins/dafeng_renamer-1
其實 softimage 本身在命名時也是有一樣的問題...在自己用的時候是沒什麼差別...可是在要轉給 MAX 用的時候就會有差了..排序會不一樣....
這更名工具.完全可以解決這問題...讚....XD
Interactive Thickness 像是 MAX 的 shell 的工具
介紹一個 像是 max 的 shell 的工具...
【Interactive Thickness ver.1.1】

找的網頁在這..
http://artifacts.sakura.ne.jp/sakanaya/2008/03/softimagexsi_interactive_thick.htm
這可以下載 Interactive Thickness ver.1.1 的版本
http://artifacts.sakura.ne.jp/sakanaya/file/Interactive_Thickness.xsiaddon
【Interactive Thickness ver.1.1】

找的網頁在這..
http://artifacts.sakura.ne.jp/sakanaya/2008/03/softimagexsi_interactive_thick.htm
這可以下載 Interactive Thickness ver.1.1 的版本
http://artifacts.sakura.ne.jp/sakanaya/file/Interactive_Thickness.xsiaddon
Geometry Constraint for Softimage
Geometry Constraint for Softimage from Mohammad Abdulfatah on Vimeo.
連結原網頁:
http://shaderop.com/projects/geometry-constraint/
能控制物件沿著其他物件表面移動...
Face Robot workflow tips for combining heads with bodies
原網址:
http://xsisupport.wordpress.com/2009/10/16/face-robot-workflow-tips-for-combining-heads-with-bodies/
Courtesy of Mr Jeff Wilson, some tips on attaching Face Robot heads to characters:
“There are a few ways to go about it, depending on the pipeline that you are in.If you just want to get the end result from Face Robot onto your character.................
請到原網頁看吧..
Cogwheel gear via ICE
原網址:CGTalk
http://forums.cgsociety.org/showthread.php?f=24&t=922724

恩就是一個..齒輪旋轉的工具...不過看起來還有些問題...
剛好工作上有需要所以特別注意到...希望作者繼續加油嚕....
啥??..為什麼不幫忙......
這...我是有想啦...可是點開他連的 node 後就放棄了.....Orz..很多東西不是一個小美術能懂的
http://forums.cgsociety.org/showthread.php?f=24&t=922724

恩就是一個..齒輪旋轉的工具...不過看起來還有些問題...
剛好工作上有需要所以特別注意到...希望作者繼續加油嚕....
啥??..為什麼不幫忙......
這...我是有想啦...可是點開他連的 node 後就放棄了.....Orz..很多東西不是一個小美術能懂的
Softimage 2011 Essentials Learning Videos

This collection of videos created by Digital Tutors introduces new users to the features of Sofimage 2011.
http://usa.autodesk.com/adsk/servlet/item?siteID=123112&id=15505585&linkID=12544118
Kristinka Hair 2.0

http://www.si-community.com/community/viewtopic.php?f=19&t=856
Short change log for version 2.0
FIXES AND IMPROVEMENTS
- Fixed issue with 'filler' point cloud, that some strands disappear in rendering, when point positions on filler cloud were too close to guides.
- kH Subdivide Strands is about ten times faster in interaction. Now it uses a different way for curve creation.
- kH Cross Sections is re-written from scratch. Now it will adapt automatically to used NURBS surfaces. Added option for filtering, by using another NURBS surface.
- kH Follow NURBS has a new way for using the alternative strand array. Also, now it's able 'extend' it's influence outside of Y(V) of surface.
- kH Follow Curves is re-written from scratch. Also it has a new interface for connections.
- kH Offset Curves node has a few new options (align profile to tangent, clump effect), also a new interface for connections.
- kH Curls has additional, 'roll' option for rotating a whole deformation, along strand tangent. Also it can invert the basic deformation.
- All emitters have built-in grid type emission. Old, random emission is still available. There is unique interface for both emission types.
- kH Point Color is able to display alpha (transparent strands) in view ports.
- kH Bend is re-written from scratch, now it's possible to use multiple kH Bend nodes, one after another, or together with other modifiers.
- 'Point Dynamics' is simplified, should be much more accurate in conversion from point to strand movement.
- Numerous other improvements.
NEW NODES
- kH Strand Tips: combined node for creating random deformations on hair tips.
- kH Splay Fur
- kH Strand Screen Size In SI Units
- kH Follow NURBS m(ultiple)
- kH Stick To Strand Extrusion
Olivia Ong 王儷婷
You and Me
-----------------------------------------------------------------------------
Here, There and Everywhere
-----------------------------------------------------------------------------
Here, There and Everywhere
Two Undocumented Lip sync commands in Softimage 2011 SP1
以下內容來自
http://www.softimageblog.com/archives/517#utm_source=feedburner&utm_medium=feed&utm_campaign=Feed%3A+xsi-blog%2Fcontent+%28XSIBlog%29&utm_content=Google+International
In Softimage 2010, a new lip sync feature was added to Face Robot (here’s the doc). In 2011 SP1, there are three new commands to get the data out into your own tools. One of them doesn’t even require the use of Face Robot and calls the speech recognition library directly.
The commands return VBScript-compatible multi-dimensional arrays. This is transparent in VBScript and Python, but it requires a bit of magic in JScript, so check the example in the first command if that’s what you’re using.
ICE hair 工具 Melena

studioNEST's Melena is a hair styling and simulation framework based on the Autodesk Softimage ICE platform. Its toolset features various hair generation tools, effects as well as custom simulation nodes and forces. By supporting lattices for styling as well as for simulation Melena enables artists to create directable simulations. Melena has been used in production for creating the stylized hair for the No Pets Allowed project that we are working on, and is now released under GPL for download.
http://www.studionestbarcelona.com/opensource/2010/5/3/studionests-melena.html
XSI ICE 用 ICE 來控制物件算圖的顏色
UV Pass to remap in compositing
在 XSI Base 有關 UV Pass to remap in compositing 的討論....
http://www.xsibase.com/forum/index.php?board=12;action=display;threadid=41714

http://www.xsibase.com/forum/index.php?board=12;action=display;threadid=41714

Linear Workflow in Softimage
Linear Workflow in Softimage
http://kobayashystips.blogspot.com/2009/09/linear-workflow-in-softimage.html

http://kobayashystips.blogspot.com/2009/09/linear-workflow-in-softimage.html

Physical Sun and Sky in Softimage
Physical Sun and Sky in Softimage
http://kobayashystips.blogspot.com/2009/09/physical-sun-and-sky-in-softimage.html

http://kobayashystips.blogspot.com/2009/09/physical-sun-and-sky-in-softimage.html

Nuit Blanche
Nuit Blanche from Spy Films on Vimeo.
The making of Nuit Blanche
Making Of Nuit Blanche from Spy Films on Vimeo.


